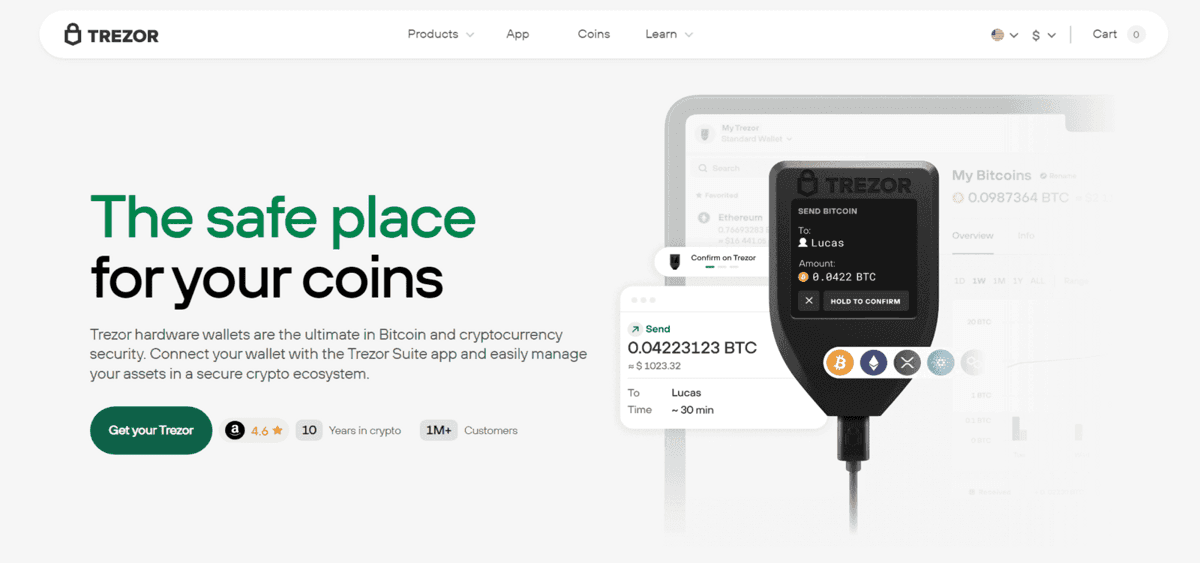
The safe place for your coins
Trezor hardware wallets are the ultimate in Bitcoin and cryptocurrency security. Connect your wallet with the Trezor Suite app and easily manage your assets in a secure crypto ecosystem.
Trezor.io/Start — Official Start Page: How to Initialize Your Device™
With the increasing adoption of cryptocurrencies worldwide, protecting your digital assets has never been more important. Hardware wallets like Trezor provide one of the safest ways to store cryptocurrency offline. Unlike software wallets that are susceptible to hacks and malware, Trezor ensures that your private keys remain secure on a physical device, offering peace of mind and control over your assets.
The first step to securing your crypto is proper device initialization. The official Trezor Start page is the hub for all setup instructions, firmware updates, and security recommendations. This guide walks you through the complete initialization process, from unboxing your Trezor to setting up your first cryptocurrency wallet.
Why Trezor Stands Out Among Hardware Wallets
Trezor is recognized globally for its security, reliability, and ease of use. It provides a secure environment for storing a wide range of cryptocurrencies including Bitcoin, Ethereum, and hundreds of altcoins. Key advantages include:
- Offline storage: Private keys are never exposed to the internet.
- Multi-currency support: Manage numerous cryptocurrencies from one device.
- Open-source firmware: Transparent and auditable for security verification.
- Regular updates: Firmware improvements enhance security and add new features.
Accessing the Official Start Page
To begin, always visit the official start page by typing https://trezor.io/start directly into your browser. Avoid links from emails, social media, or third-party websites to prevent phishing attacks. The start page provides the latest software, installation instructions, and tips to safely initialize your Trezor device.
Unboxing and Preparing Your Device
When you receive your Trezor device, inspect the packaging carefully. Trezor ships with tamper-evident seals to ensure the device hasn’t been compromised during delivery. Inside the box, you will typically find:
- The Trezor device (Trezor One or Trezor Model T)
- A USB cable for connection
- A recovery seed card to store backup words
- Setup instructions and user manuals
Step-by-Step Initialization Process
1. Connect the Device to Your Computer
Plug your Trezor device into your computer using the provided USB cable. Once connected, the device screen will light up with a welcome message, confirming it has powered on properly. This is the first indication that your device is authentic and ready for setup.
2. Navigate to the Official Start Page
Open a secure browser and visit https://trezor.io/start. The page will guide you through every step, including downloading required software, verifying device authenticity, and updating firmware if needed.
3. Install Trezor Bridge
Trezor Bridge is a lightweight application that allows your computer to communicate with the device securely. Follow the instructions on the start page to download and install it. Once installed, your computer will recognize the Trezor whenever it is connected.
4. Update Firmware
Firmware updates are crucial for security and functionality. If prompted, update your device’s firmware via the official interface. The process is simple, and the device will guide you through confirmation screens. Never skip this step, as outdated firmware can leave vulnerabilities.
5. Generate a Recovery Seed
Your Trezor will generate a recovery seed, typically 12 to 24 words, which serves as a backup for your wallet. Write these words carefully on the provided recovery card. Avoid storing the seed digitally or taking photos of it, as this exposes your wallet to potential theft. This seed is the only way to recover your funds if the device is lost or damaged.
6. Set a Secure PIN
The device will prompt you to create a PIN. Trezor uses a randomized PIN entry screen, which prevents observers or keyloggers from easily capturing your code. A strong, unique PIN is essential for protecting your wallet against unauthorized access.
Adding Cryptocurrencies to Your Wallet
Once initialized, you can start receiving cryptocurrencies. Trezor supports various coins and tokens through its native wallet interface or compatible third-party wallets. Each cryptocurrency has a unique address, ensuring your assets remain secure while being fully accessible for transactions.
Security Best Practices
While Trezor provides robust hardware security, user practices play a vital role. Key recommendations include:
- Always verify the website URL before entering sensitive data.
- Never share your recovery seed or PIN with anyone.
- Keep firmware updated to patch vulnerabilities.
- Store your recovery seed in a secure offline location, preferably in multiple copies.
- Consider using a passphrase in addition to your seed for enhanced security.
Conclusion
Initializing your Trezor via the official start page ensures a secure foundation for managing cryptocurrencies. By following the recommended steps, creating a backup, setting a strong PIN, and maintaining security best practices, you can confidently safeguard your digital assets.